
SCHOOL OF CAKECRAFT

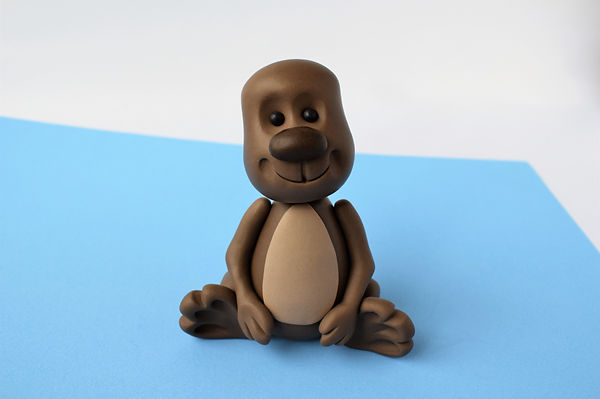
Meet Daisy!
Free mini tutorial!
Tools and equipment!
Gel Colours-
-
Dark Brown
-
Black
-
Navy
For shading I used Sugarflair Edible Tint
-Dusky Pink
Paste-
- 100g brown modelling paste divided into the following amounts
-
45g Body
-
30g Head
-
12g legs (2 x 6g)
-
5g Arms (2 x 2.5g)
-
5g Ears (2 x 2.5g)
- 4g Light Brown modelling paste.
- 1g White modelling paste.
- 1g Navy modelling paste.
- 1g Black modelling paste.
- 1g Dark Brown modelling paste.

Tools -
Balling tool
Dresden tool
Rolling pin
Small Piping tip
Small paintbrush for gluing
Large soft bristled paintbrush for dusting.
Sharp knife
Cool boiled water (for gluing things together)
Paper lolly stick (cake pop stick)
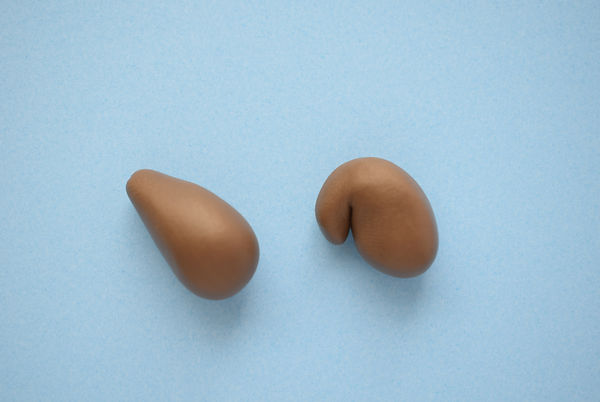
Step one - Body
Take 45g of brown modelling paste, roll into a tear drop shape.
Sit on the work surface and gently flatten the top with your finger tip.

Step two - Legs
To make the back legs, divide 6g of brown modelling paste equally into two and roll into balls.

Roll each ball into a teardrop and bend over the tip as shown.
Stick into place as shown.


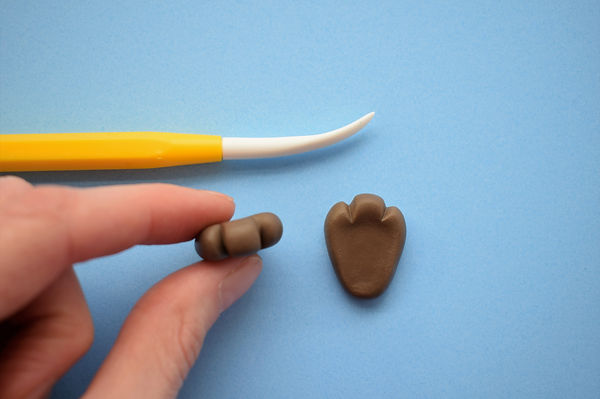
Take 6g of brown modelling paste, and divide equally in half. Roll each half into a teardrop shape and flatten with your finger tip as shown.

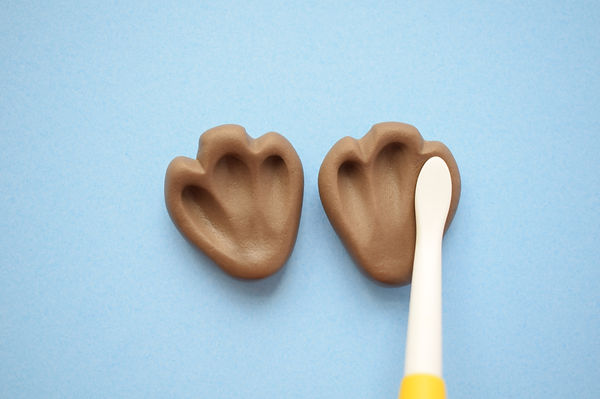
Use the veining end of the Dresden tool to mark the toes as shown.
Use the smoothing end of the Dresden tool to indent the sole of each foot as shown. Set to one side to firm up whilst you prepare the next part.
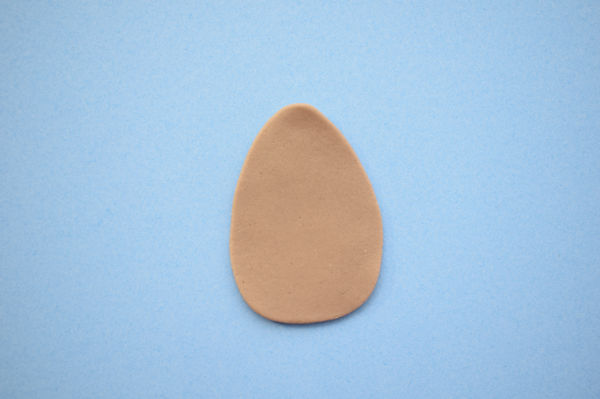
Take 2g of light brown modelling paste, start by forming a teardrop shape and then roll out to a thickness of around 2mm as shown.
Stick the chest piece and feet into place as shown.

Step three - Arms
Take 5g of brown modelling paste and divide equally in half.
Roll each piece into a long thin sausage that is fatter at one end as shown on the left.
Flatten the end with your fingertip to form the hand as shown on the right.

Use the veining end of the Dresden tool to mark the paws as shown.
Carefully bend and pinch out the elbow on each arm as show.
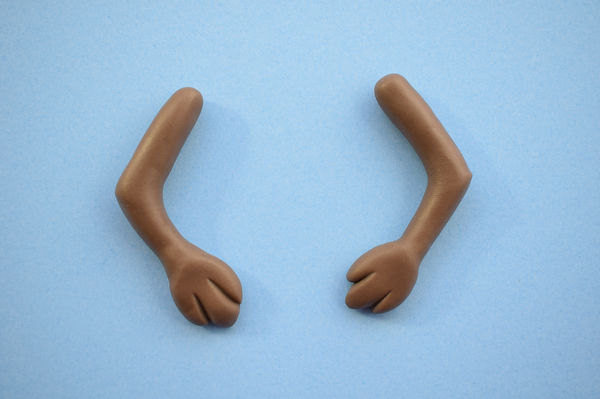
Stick into place as shown.

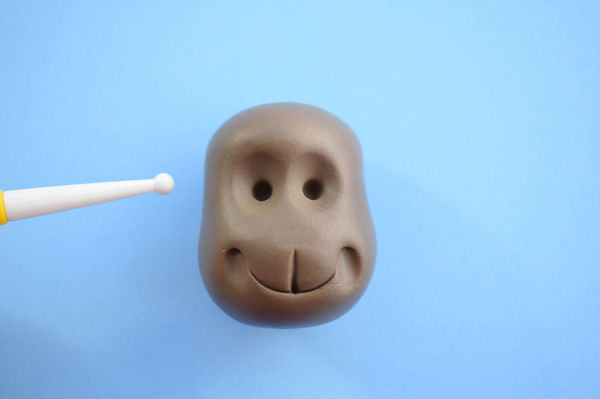
Step four - Head
Take 30g brown modelling paste and roll into a ball.
Roll the top of the ball between your thumb and forefinger to narrow the head slightly as shown.

Gently push in with the bottom of the piping tip to mark the mouth as shown.

Use the veining end of the Dresden tool to mark the central line on the mouth as shown

Use the smoothing end of the Dresden tool, gently press in and mark each corner of the mouth as shown.

Use the large end of the balling tool to indent two eye sockets as shown.

Use the small end of the balling tool. Gently press in to make two small eye sockets as shown.
To make the nose take a small ball of the dark brown modelling and roll into the shape as shown and stick into place.
Take two small balls of black modelling paste, roll into balls and stick into place as shown.

Gently push the paper lolly stick down through the centre of the neck and into the body, so that approximately 2cm remains protruding from the top. Gently push the head down onto the stick until it rests on the neck as shown.
Divide 5g of brown modelling paste and 1g of light brown modelling paste equally in half. Roll each into a long sausage tapered at one end as shown.
Lay the light brown paste on top of the brown paste. Use the smoothing end of the Dresden tool to gently push the light brown paste into the dark brown paste as shown.
Take a sharp knife and trim the top of each ear on an angle as shown.


Stick the ears into place as shown.
To make the eyebrows - Take two tiny balls of light brown modelling paste and roll into elongated teardrops, stick into place as shown.
Roll two tiny balls of white modelling paste and stick onto the eyes as shown.

Take the remaining light brown modelling paste and roll into a small teardrop shape. Stick into place as shown to make the tail.

Step five - Finishing touches!
Take the navy blue modelling paste, roll out to approximately 1mm thick, and cut two rectangles approximately the sizes shown.
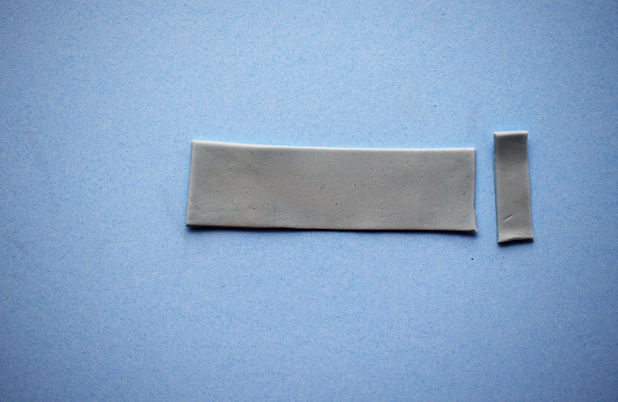
10 cm
2cm
2.5cm
1cm
Fold each end into the centre of the strip and gently pinch together as shown.
Glue the thin strip across the joint to form the centre of the bow as shown.


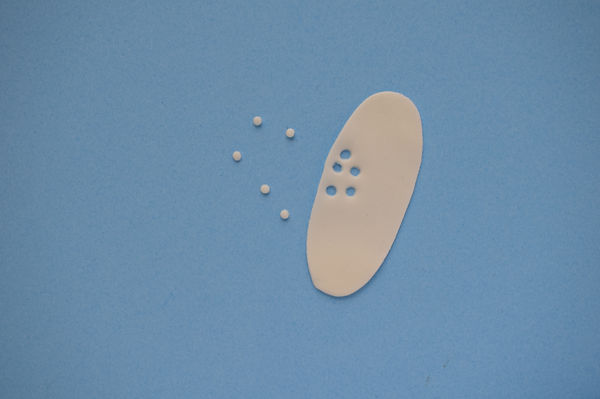
Roll out the white paste as thin as you can get it. Use the piping nozzle to cut out tiny circles.
If they get stuck in the piping nozzle, use a soft bristled paint brush to gently push them out.
Stick the dots onto the bow and stick the bow into place on top of the head as shown.

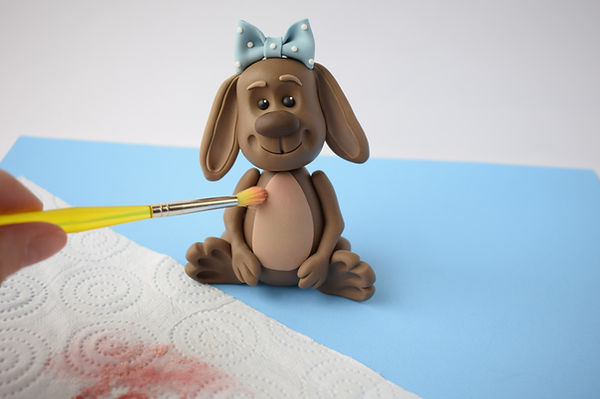
Take a soft bristled paintbrush and small amount of edible dust to shade lightly around the edge of the chest area.
Your bunny is now complete!
